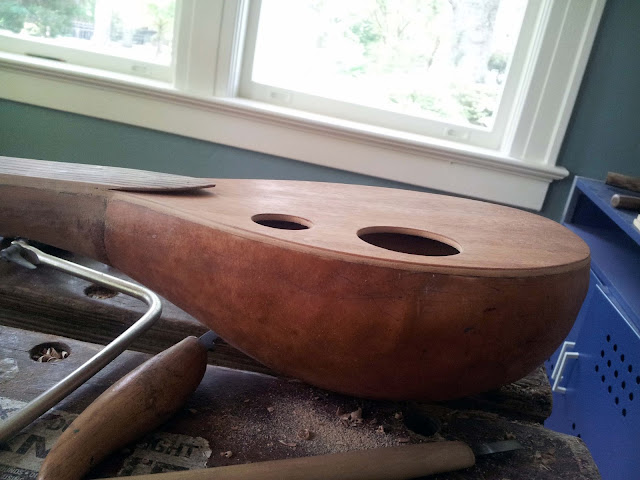
To attach the soundboard to the body of the ukulele, I first added some wooden braces, to add a bit of surface area to glue to:
Skipping a few steps...
I made the soundboard from the bottom of an old drawer. Unfortunately, the wood turned out to be veneered rather than solid, which according to the internet is inferior. It sounds okay to me though. I did not have any particular method for choosing the hole size and location. I just tried to make them look nice. I cut the holes by drilling a pilot hole through the wood, and then sawing them out with a coping saw.
I shaped the oak fretboard and glued it to the neck. It becomes much thinner where the neck meets the body, so that the part of the fretboard that overlaps the soundboard does not actually touch the soundboard.
I wanted to get the ukulele to a playable state before I returned to campus, so I bought some violin tuning pegs rather than making my own. I reamed the tapered holes using a combination of drill bits and a pair of scissors with appropriately tapered blades.
I used an online fret spacing calculator to figure out where the frets should go. I carefully marked out their locations, and then cut slots for the frets with the coping saw.
I wasn't confident that the barbs on the fret wire alone would hold the frets in, since the coping saw blade was a little too wide. I applied some epoxy to the frets before hammering them into place.
I snipped the frets flush, and then filed the edges smooth:
I made the nut out of some more oak, and the bridge out of oak and mahogany.
My original bridge design held all the tension of the strings. After a few hours of being strung, I noticed the glue on one side pulling up from the soundboard. I cut away most of the bridge, and drilled holes diagonally through the back of the instrument and the soundboard for the strings to feed through.
I did not have time to finish the wood at home, so I grabbed some tung oil out of a cabinet at MITERS, and finished it there.
With the strings back on. I actually prefer how this string arrangement looks over the failed one.


Really glad I found this blog as I have a project in mind that is very similar; it involves reincarnating an old Cuban shekere which is starting to lose its outer network of rattling beads. A ukulele is to be its next life. In your design, why did you keep the fretboard off the soundboard? Do you think the gap improves the sound or was that only for appearances? It looks like it could be a dirt trap. Also can you say what was the gap between the soundboard and the continuation of the neck that goes right across the gourd? How are the strings tied off? Finally, how is the strumming going? Many thanks for all the useful info and best wishes.
ReplyDeleteI left the gap because I didn't want the fretboard to stiffen up the sound board at all. I honestly have no idea if it really affects the sound, but that was the idea. The gap tapers, but it's between 1 and 2 mm. The strings are just tied into nots at the end to prevent them from pulling through. It's not an elegant solution, but it works. Maybe someday I'll make a nicer system. I'm learning slowly, but it's going well.
DeleteThis is amazing, have you thought about producing them and selling on, put my name down for one if you do.... People will pay good money for one of these.
ReplyDelete