Actually it is not quite mechanically done, but it is finished enough for unpowered test rides.
To attach the top plates to the frame, I had to drill and tap a bunch of holes in the parallel vertical plates. They were lined up for drilling by the holes on their bottom sides, because there were no other common reference points between all them due to their unusual shapes.
Apparently I did an okay job measuring, because the two top plates lined up well with each other as well as their screw holes:
The assembled frame:
For brakes, I used a pair of calipers and disks designed for cheap electric scooters. They are pretty poor quality, but are way cheaper than similarly sized options like mountain bike disk brakes.
I was planning to cut off the corners of the bearing blocks. Fortunately I did not, because I ended up bolting the brake caliper through that corner.
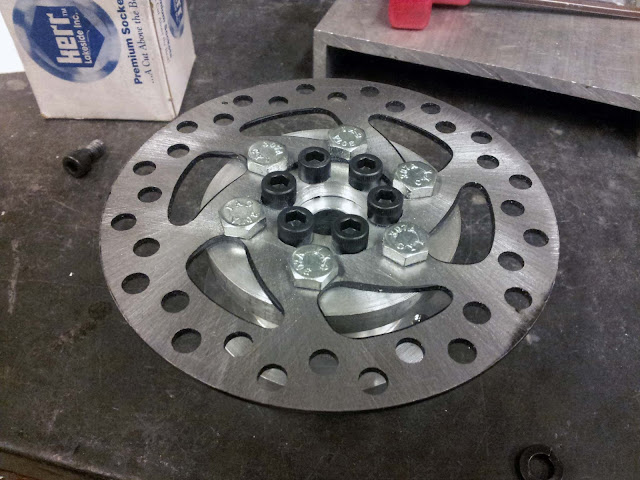
The wheel hubs were not quite wide enough to mount the brake disks to, so I had to make a pair of adapter plates. The disk is held with the hex bolts rather than socket cap bolts for clearance.
Let's put a wheel on that hub:
I made a pair of foot pegs for your feet to rest on while riding. I could not find any solid aluminum rods of proper length, so I made the pegs in two parts. Most of the length is made from 3/4" O.D. 1/2" I.D. tubing, but the ends are 3/4" rods pressed into the tubing and tapped for 1/2" 13 threads.
The original solid axle was replaced with a 1/2' threaded rod.
Because I used flangeless bearings in the bearing block, the only thing to stop them from shifting axially is their press fits. To support axial loads caused by turning the trike, I added bronze thrust washers between the shaft collars that retain the axle and the sides of the bearing blocks. This way, all the load is taken by the shaft collar and the aluminum frame, rather than the bearings.
The last missing mechanical piece was a place to sit. To make a seat, I tore down an old bicycle seat. I cut the nose off, and welded its metal understructure to the tricycle's curved steel frame:
I chose the particular bicycle seat I used because of it's unusually shaped plastic support structure. The plastic frame curves upwards at its back, providing some support to prevent the rider from simply sliding backwards off the trike when accelerating. I plan on covering the frame with carbon fiber or fiber glass composite to give it some real structure.
I wired up the brakes to a double pull mountain bike lever.
The hub gear was a lot of trouble to connect to its shifter, because the trike's frame mostly covers up the part the shifting cale attaches to.
I have done some unpowered testing, both by having someone push me around, and by riding it in "scooter mode", where I stand on the aluminum top plate, and push myself around with the other foot. The tilting definitely takes some getting used to, as does having your feet planted next to the front wheel, and therefore turning with the wheel. The combination of short wheelbase and tilting gives it a tiny turning radius.
Now I just have to do all the electrical things; build a battery pack (or two), wire everything, get a throttle, and time the hall sensors around the motor. I still have not decided what type of throttle to use. Since the right side of the handlebars already has two triggers on it for shifting, I may use a left handed thumb throttle, meaning I probably need to make my own.


No comments:
Post a Comment