

I've been ruminating on building a small motor dyno for a while, since spending most of last summer working with really big dynamometers. While strategies like listen to the strange noises your motor is making to find glitches in your control loop and use your hand to load the motor and see how it behaves are surprisingly informative (and certainly help develop some intuition), they don't really give you any quantitative information about motor performance (although I'm learning to calibrate my wrist as a torque sensor).
For those unfamiliar with what a dynamometer is and does, it's basically a system that lets you characterize a motor/engine/other torque-producing device. The output of the motor is coupled to speed and torque sensors. Speed times torque gives the actual mechanical power coming out of the motor. At the same time, voltage and current going into the motor can be measured, giving the power going into the motor. On the other side, another motor, called the "absorber", acts as a generator to absorb all the power put out the the motor being tested.
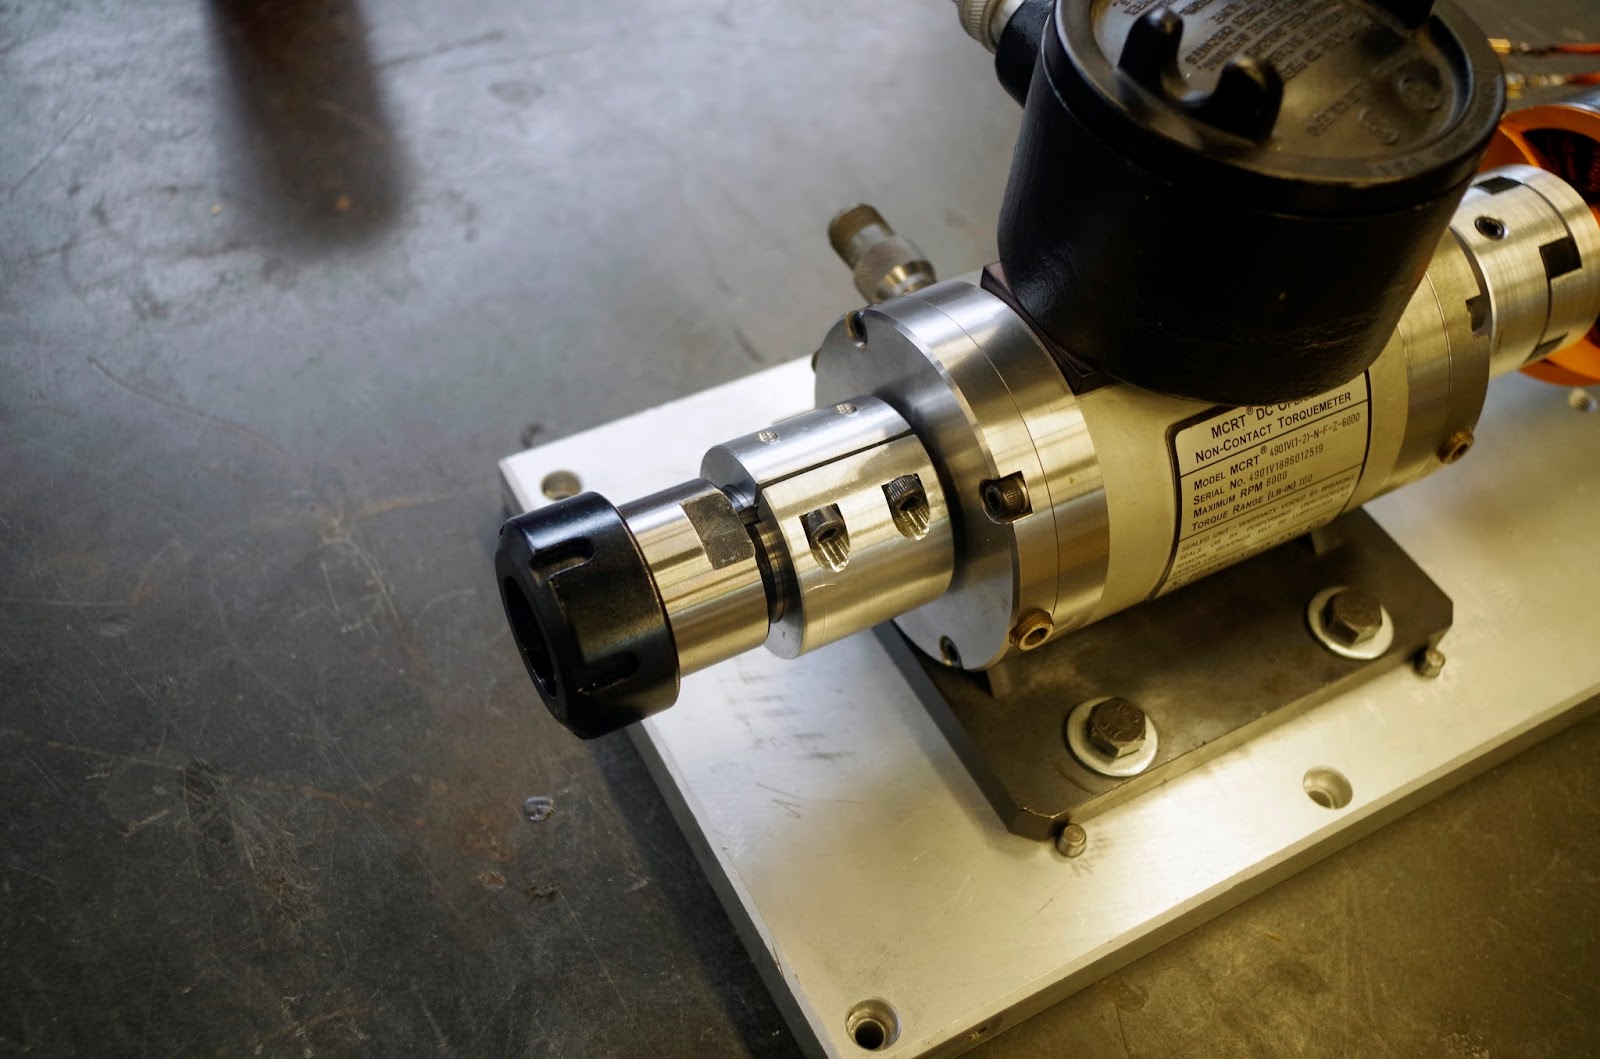
For several months my ebay home page was filled with a variety of different searches for torque sensors, and eventually I found an excellent deal on a used S. Himmelstein DC-operated torque transducer, good for 11.15 Nm of torque and 6000 RPM. It's almost perfectly matched to one of the 80-100 sized brushless outrunners, which is just about the biggest motor used in the various contraptions my friends and I build. The DC-operated versions of the Himmelstein torque sensors are especially convenient, since they just output analog DC voltage proportional to torque, which can be shoved into a DAQ for logging. Lots of the ebay-torque transducers require extra (expensive) circuitry to run the rotary transformers which interface with the strain gauges. I'm really impressed with this torque sensor - plugging it into a 16-big USB DAQ, I can easily distinguish 0.001 Nm changes in torque on the sensor, which is 1/10,000th of full scale.
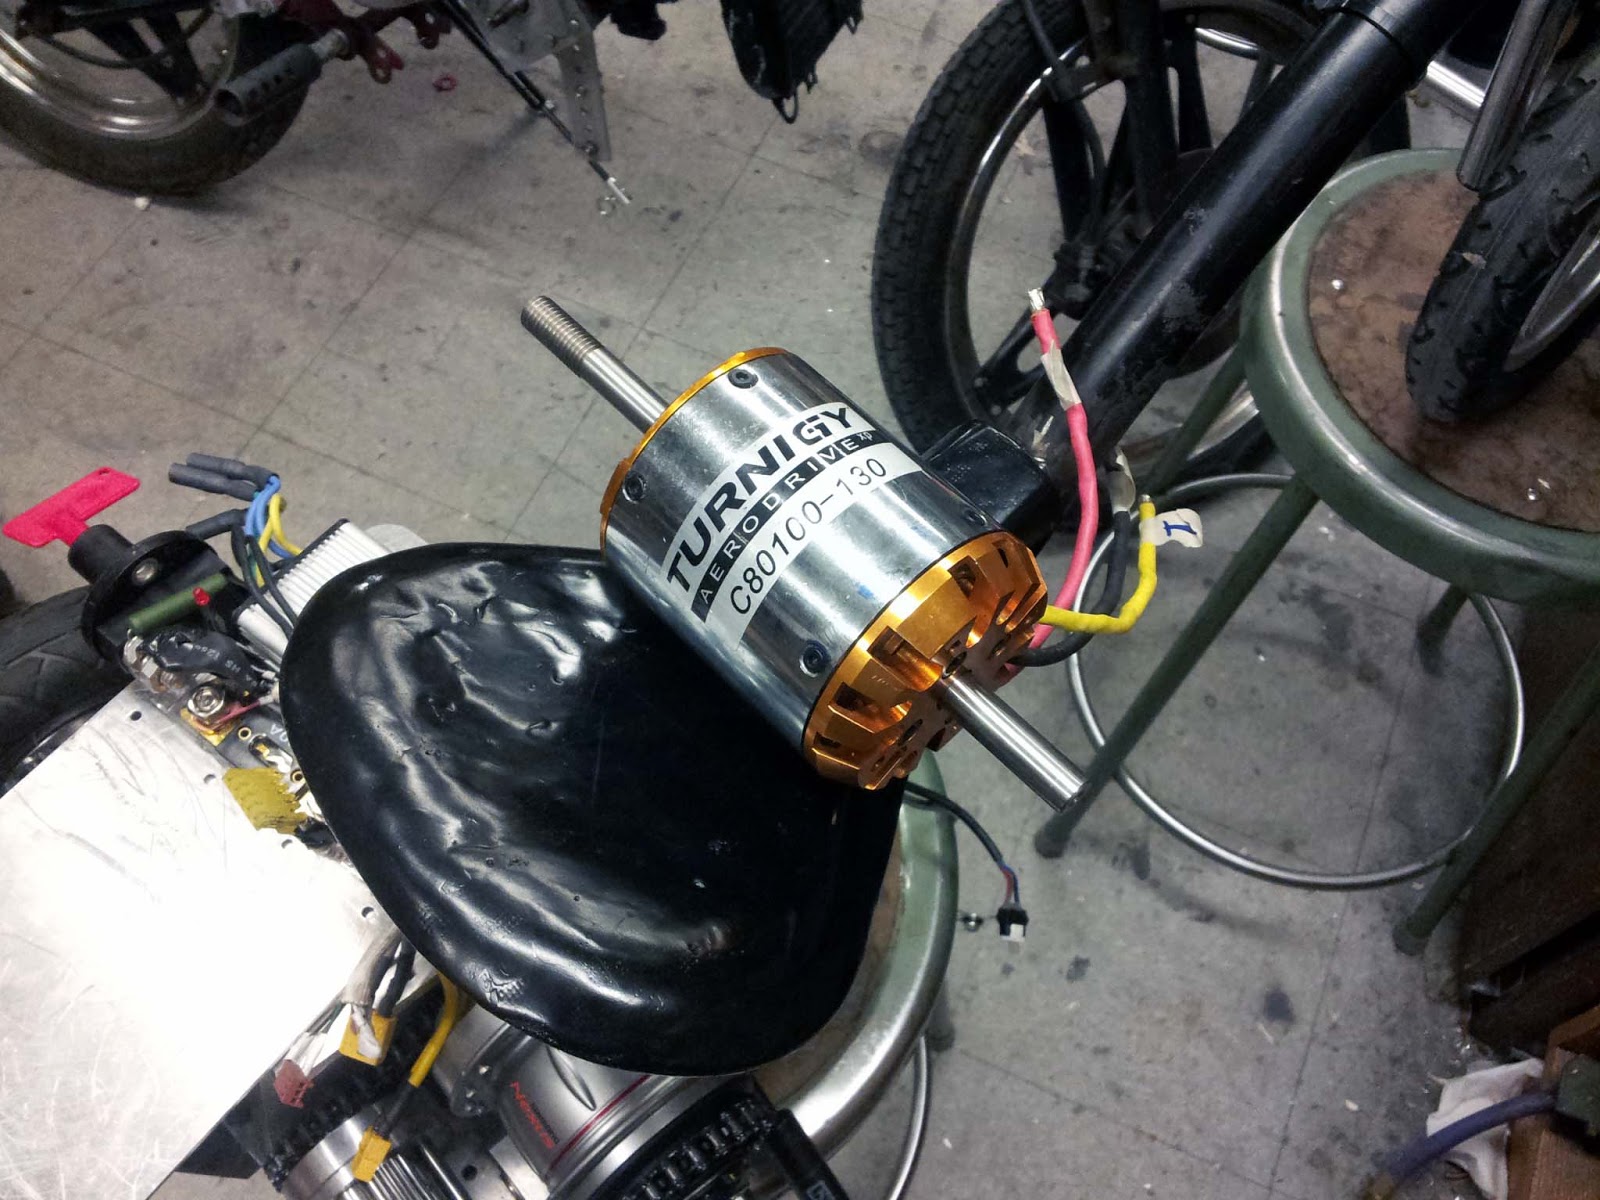
For the absorber, I started out with the original 80-100 from the electric trike, which Charles gave to me 4 years ago. When it originally stopped working due to some shorted windings, I pulled off the original windings and then it sat around until now. I did the rewind with 4 parallel strands of 16 AWG, 200 C rated magnet wire, five turns-per-tooth, wye terminated. There's still a little space between the stator slots, which I wanted for improved cooling (there will be a blower to force air through the stator).

After the rewind, the motor sits at: 13 mΩ line-to-line, and a torque constant of 0.062 N-m/A.
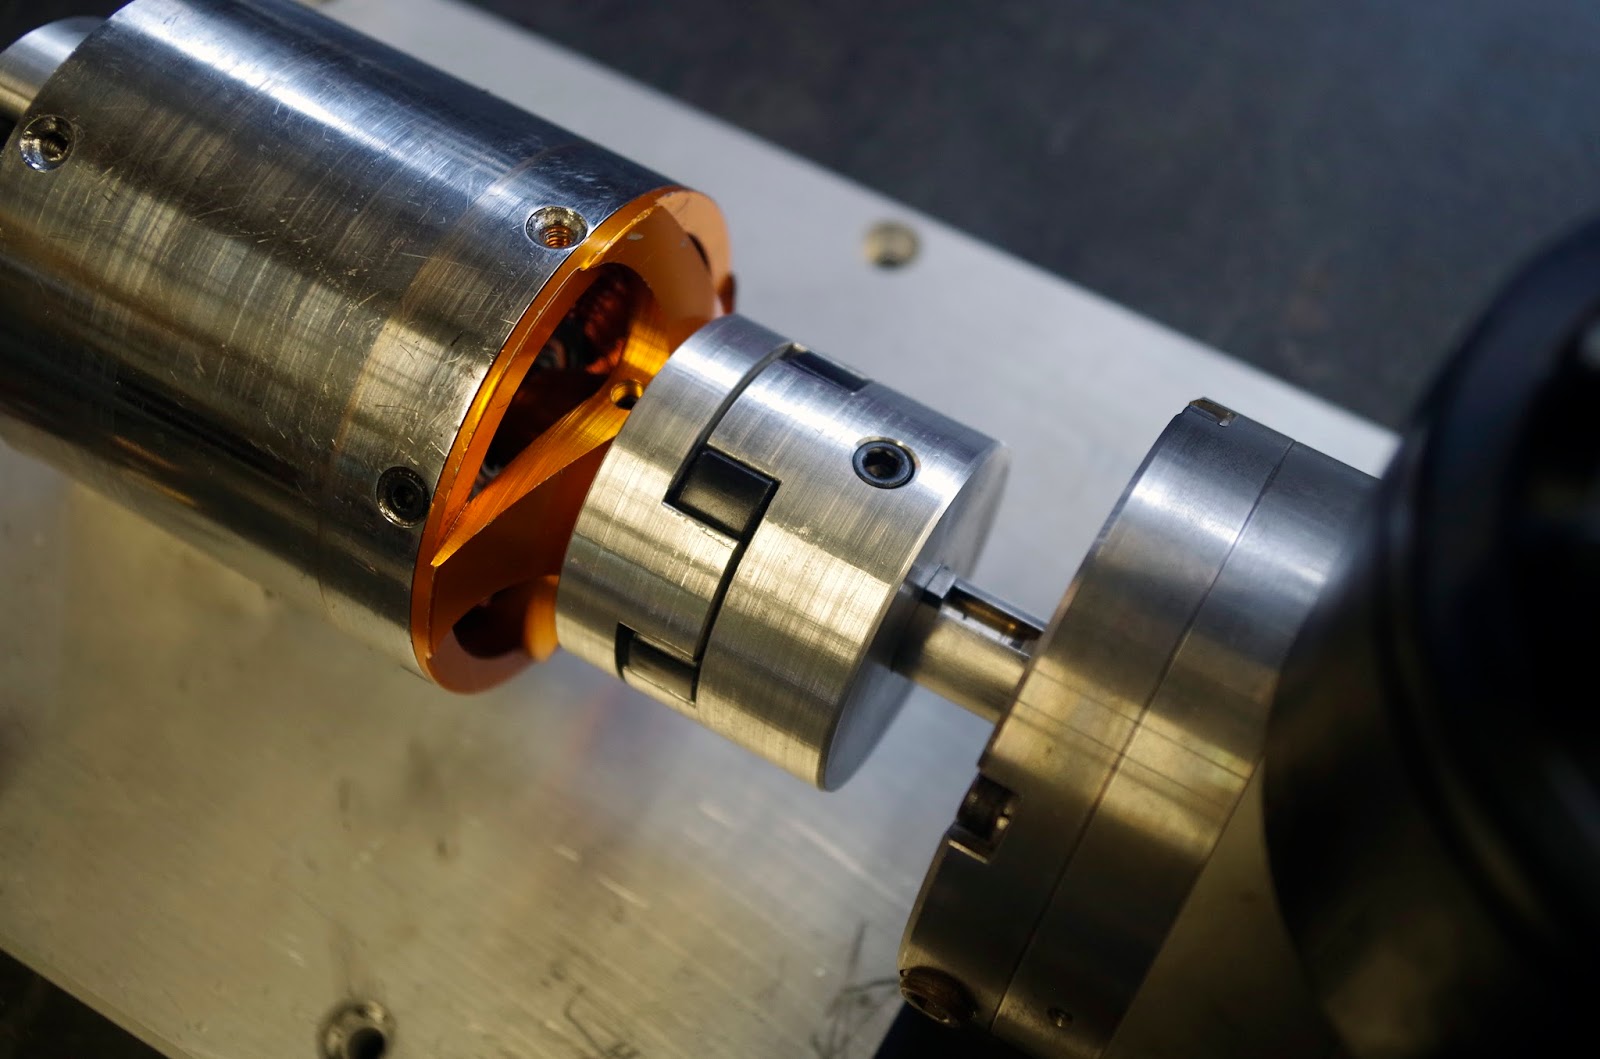
I made a base plate out of a slab of 3/4" thick aluminum I found in the trash. The motor shaft was carefully aligned to the shaft of the torque transducer, and they were coupled with some custom-machined lovejoy couplings (I bought the flexible inserts, and machined the aluminum bits):
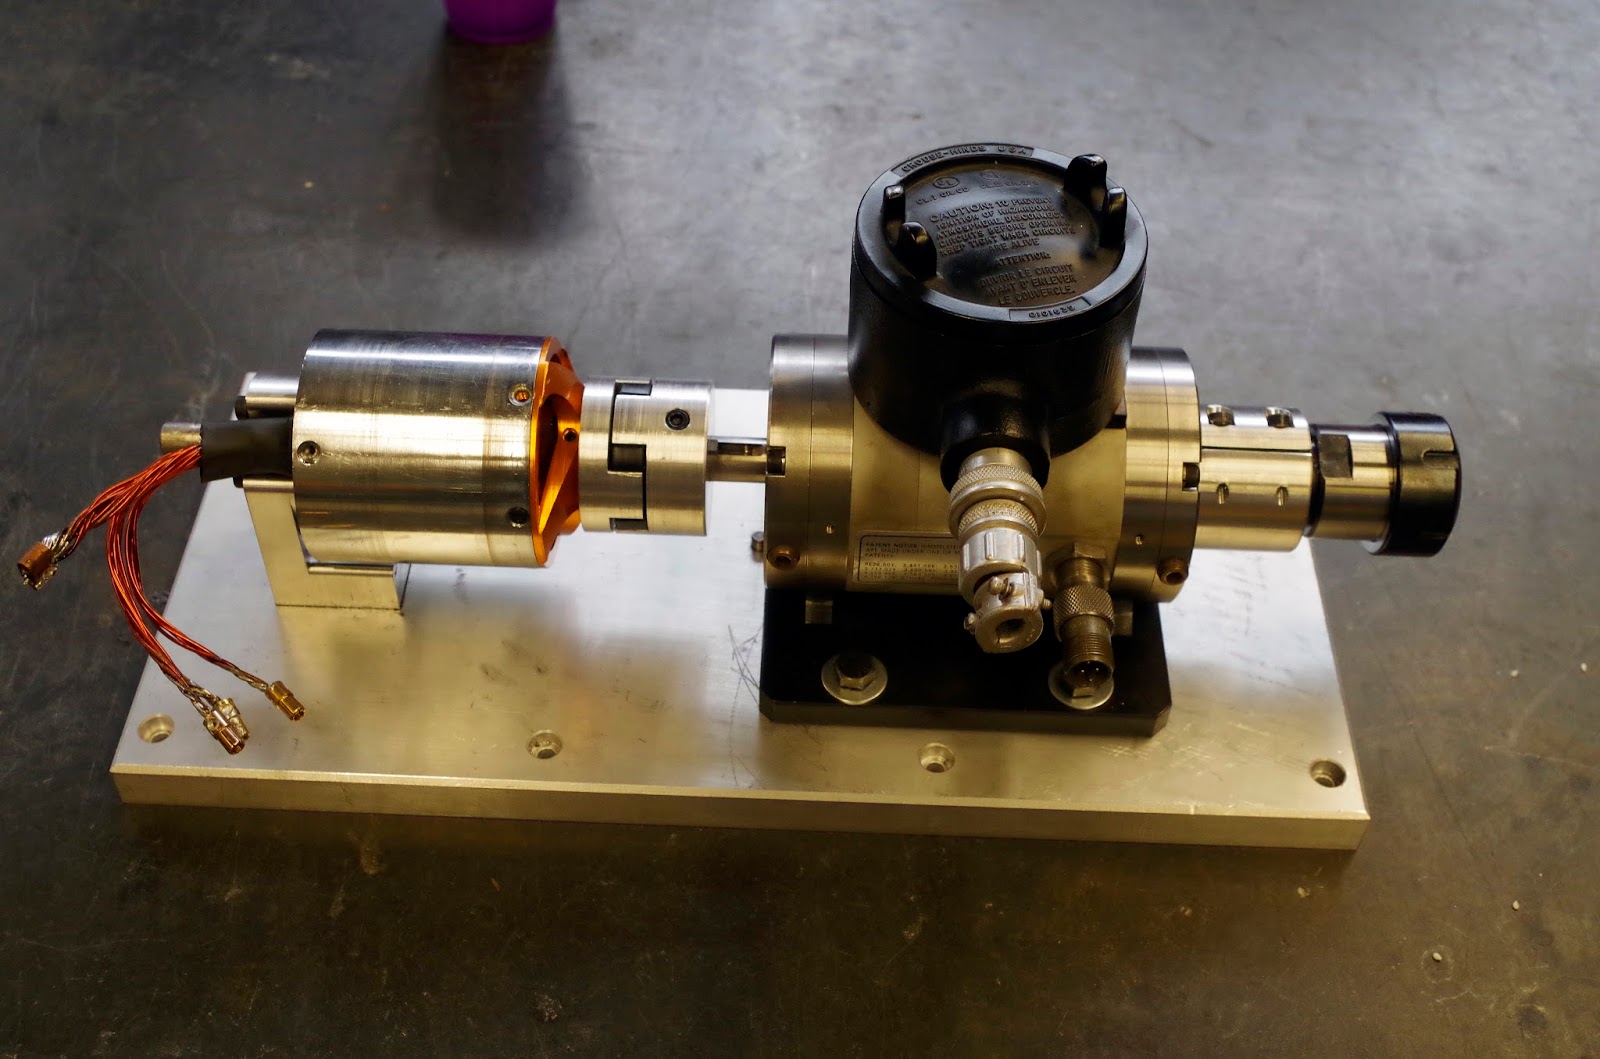
Here's the coupling pair. The absorber-side of the coupling bolts directly to the bolt pattern where one would normally attach a propeller mount, and locates on the 12mm shaft which passes through the length of the rotor. On the torque transducer side, the coupling is keyed and axially retained by a set screw into the key.
On the input-side of the torque transducer, there's an ER-32 spindle, to make it easy to couple in arbitrary motors. I got an cheap ER-32 straight shank collet holder on ebay, reamed out the inner bore, added a split, and made a big split collar to clamp the whole assembly together. I measured runout on the inside of the spindle taper at one thousandth of an inch, which is definitely good enough. The test-motor will be mounted on a compliant mount, to avoid over constraint.
The feet of the absorber and the torque sensor each locate to the base with three dowel pins, so I can repeatably assemble and disassemble the whole thing.


So that's a brief introduction to the motor dyno. Next post (which will be soon) will go into the motor controller I'm using on the absorber, as well as some initial testing of the whole thing.
No comments:
Post a Comment